Cost Allocation
The Cost Allocation page enables you to distribute cloud costs across teams, departments, and business units. Whether you need informal visibility (showback) or formal internal billing (chargeback), CLARITY provides the tools to build a complete cost accountability framework.
Page Tabs
The Cost Allocation page is organized into four tabs:
| Tab | Purpose |
|---|---|
| Showback | Tag-based cost distribution for visibility |
| Chargeback | Formal internal billing to cost centers |
| Allocation Rules | Define how costs are matched to cost centers |
| Statements | Monthly chargeback statements |
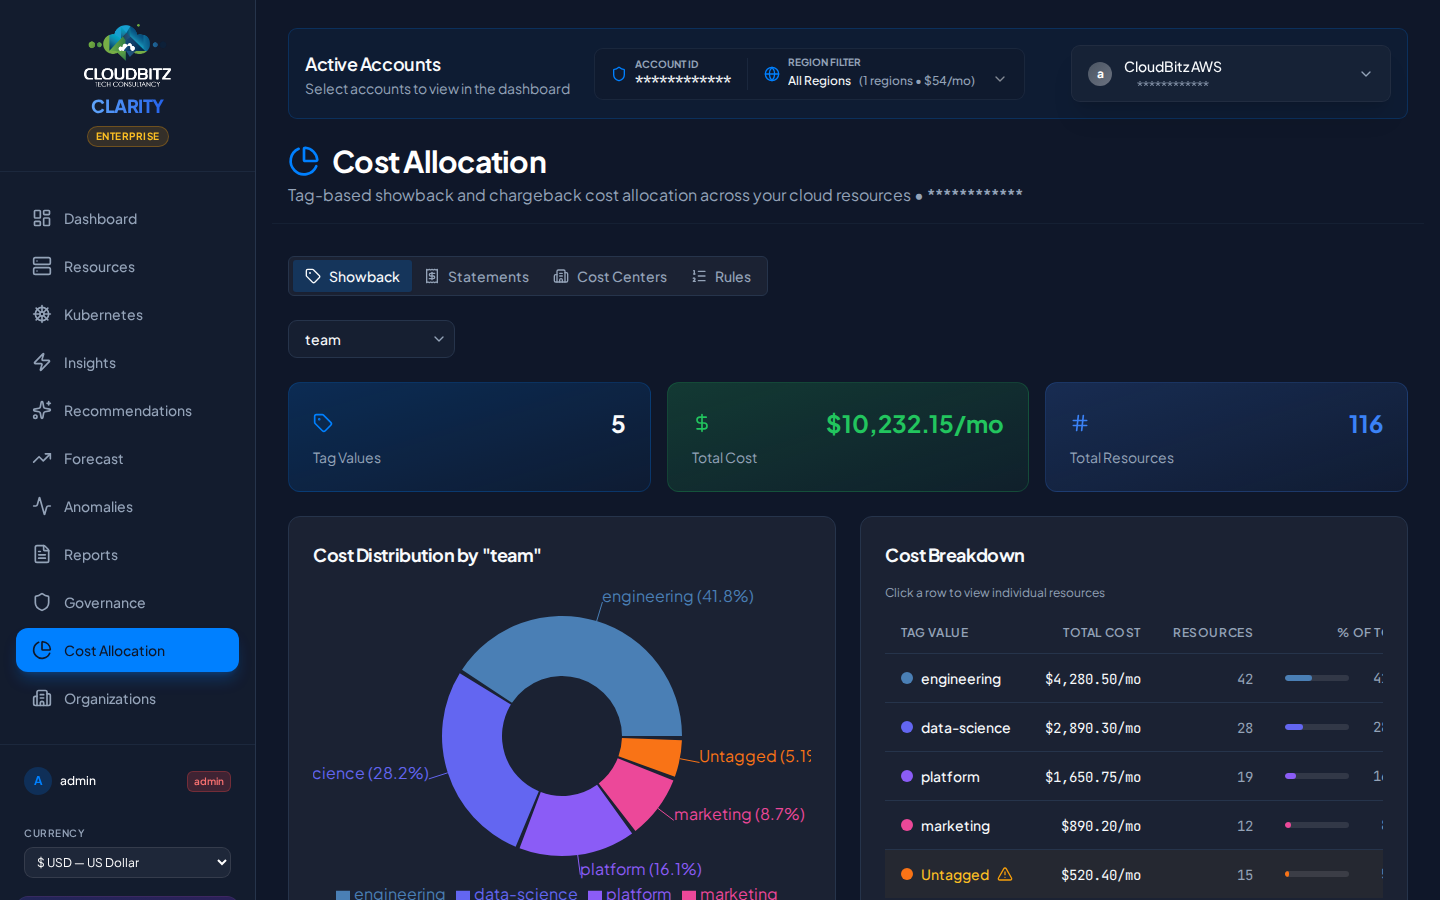
Showback
Showback provides cost visibility by distributing cloud spend based on resource tags. It answers the question: "How much is each team spending?"
How It Works
- CLARITY reads tags from all discovered resources
- Costs are grouped by the tag keys you select (e.g.,
team,department,project) - A breakdown shows total spend per tag value
Drill-Down
Click any tag group to drill into:
- The services driving cost within that group
- Individual resources and their costs
- Trend over the selected time period
TIP
Showback works best when your tagging strategy is consistent. Use the Governance page to track tag compliance and identify untagged resources.
Chargeback
Chargeback goes beyond visibility — it assigns costs to formal cost centers that map to your organization's financial structure.
Cost Centers
A cost center represents a team, department, project, or business unit that is responsible for a portion of cloud spend. Create cost centers that match your internal accounting structure:
- Engineering
- Data Science
- Marketing Platform
- Shared Infrastructure
Each cost center has:
- A unique name and description
- An optional budget limit
- An owner or contact
Default Cost Center
One cost center is designated as the default. Any cloud costs that do not match any allocation rule are automatically assigned to the default cost center.
WARNING
Always configure a default cost center. Without one, unmatched costs will not appear in chargeback statements, creating blind spots in your cost accountability.
Allocation Rules
Allocation rules define the logic for matching cloud costs to cost centers. Rules are evaluated in priority order (highest priority first), and the first matching rule wins.
Rule Conditions
Each rule specifies one or more conditions:
| Condition Type | Example |
|---|---|
| Service | Match all EC2 or Azure VM costs |
| Tag | Match resources tagged team:data-science |
| Resource Type | Match all S3 buckets or Cloud SQL instances |
| K8s Namespace | Match costs from the production namespace |
| Provider | Match all AWS or GCP costs |
| Region | Match resources in us-east-1 |
Priority System
When multiple rules could match the same cost, priority determines which rule applies:
- Priority 100 is evaluated before priority 50
- If no rule matches, the cost goes to the default cost center
- You can reorder rules by adjusting their priority values
Creating a Rule
- Click Add Rule in the Allocation Rules tab
- Select the target cost center
- Add one or more conditions (conditions within a rule use AND logic)
- Set the priority (higher number = evaluated first)
- Save and preview which resources the rule would match
TIP
Start with broad rules (e.g., all costs tagged department:engineering go to the Engineering cost center) and add specific rules for exceptions. Use priority to ensure exceptions are evaluated first.
Statements
Monthly chargeback statements provide a formal record of cost allocation for each billing period.
What's in a Statement
Each statement includes:
- Billing period — The month covered
- Per-center breakdown — Total cost allocated to each cost center
- Unallocated costs — Any spend assigned to the default cost center
- Rule matches — Which allocation rules applied
- Trend comparison — Month-over-month change per cost center
Generating Statements
Statements are generated at the end of each billing period. You can also generate a mid-month preview to see the current allocation status.
Setting Up a Basic Chargeback Workflow
Follow these steps to get started:
Step 1: Create Cost Centers
Define your organizational units. Start with 3-5 top-level cost centers that map to your team or department structure.
Step 2: Establish Tagging Standards
Ensure resources are tagged consistently. At minimum, adopt a team or department tag across all providers.
Step 3: Define Allocation Rules
Create rules that match tags, services, or namespaces to cost centers. Set priorities so that specific rules override general ones.
Step 4: Designate a Default Cost Center
Assign a default cost center (often "Shared Infrastructure" or "Unallocated") to catch costs that do not match any rule.
Step 5: Review and Iterate
Generate a preview statement and review the allocation. Adjust rules and priorities until the distribution reflects your organization's reality.
INFO
Cost allocation is most effective when combined with consistent tagging. Use CLARITY's governance features to enforce tagging standards and improve allocation accuracy over time.